Q.How do I set up an email account with the Windows 10 Mail app?
To add an Ochanoko email account to Windows 10's Mail app, you first need to create an Ochanoko email account. If you have not yet done so, please see the following FAQ article: How do I create an email account?
Once you have your email account, open your Mail app. One of two screens will appear, depending on whether you have previously set up an email account in this app.
If you have not used this app before, the following screen will appear:
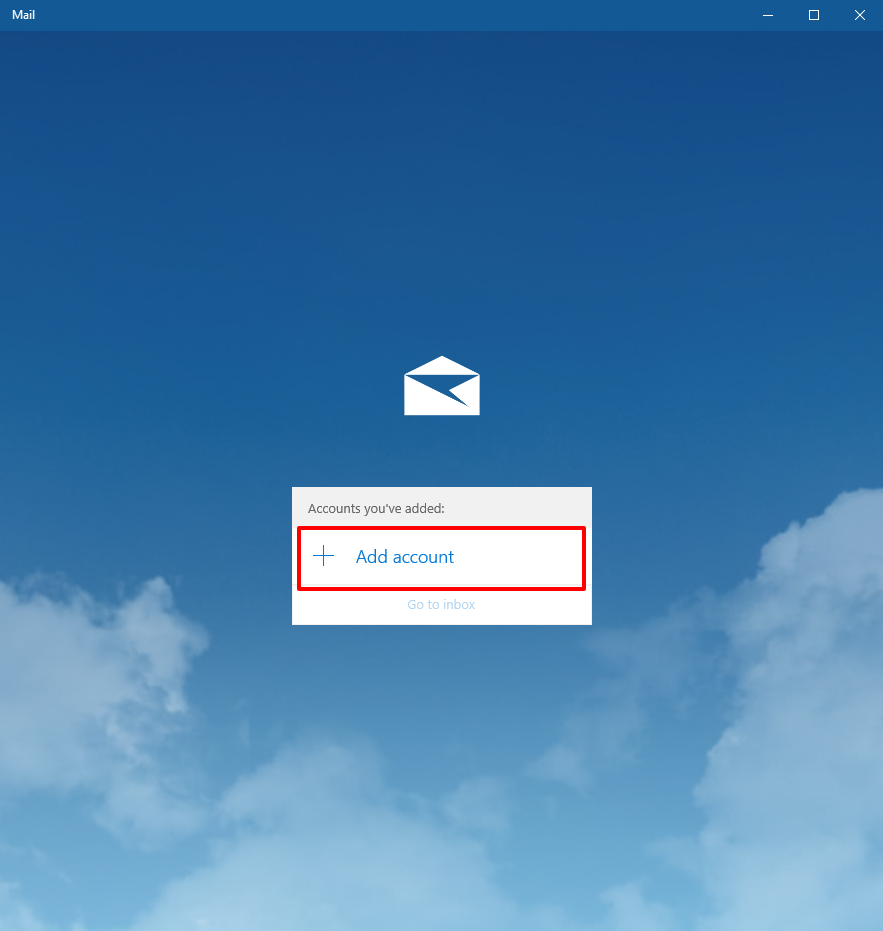
Click the Add Account button in the middle of the screen.
If you have used this app previously, the following screen will appear:
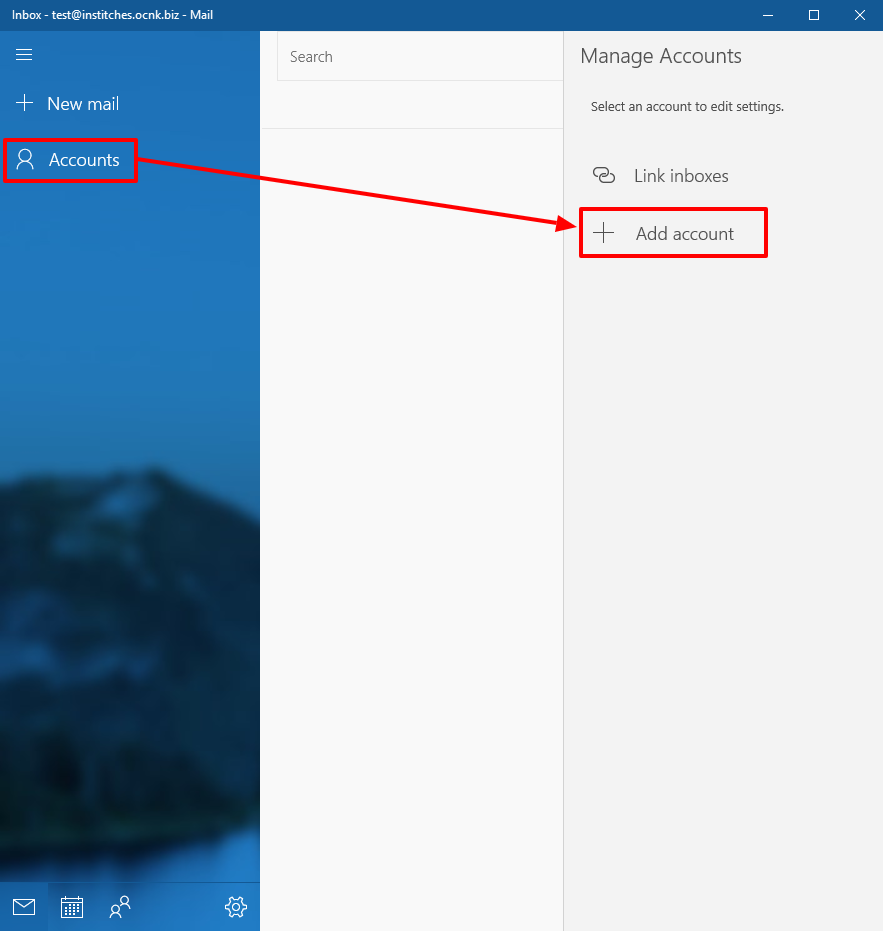
Click Accounts in the left panel, and then click Add account in the panel that appears on the right of the screen.
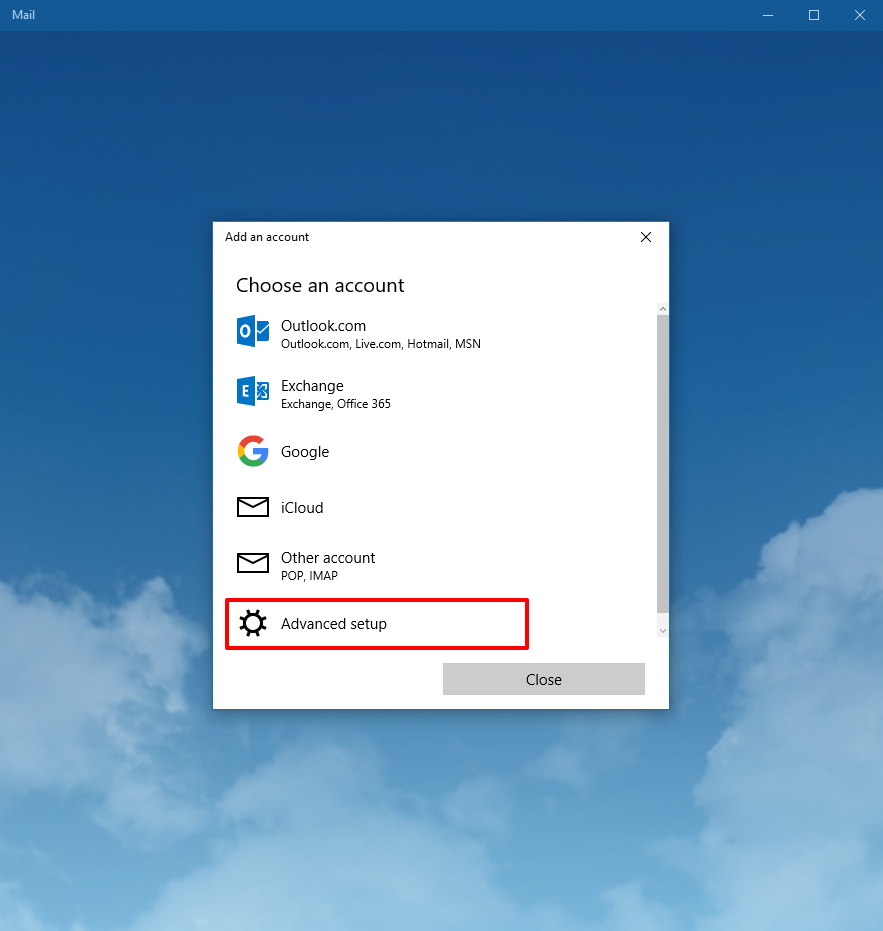
From either of these screens, the following pop-up will appear. Click Advanced setup.
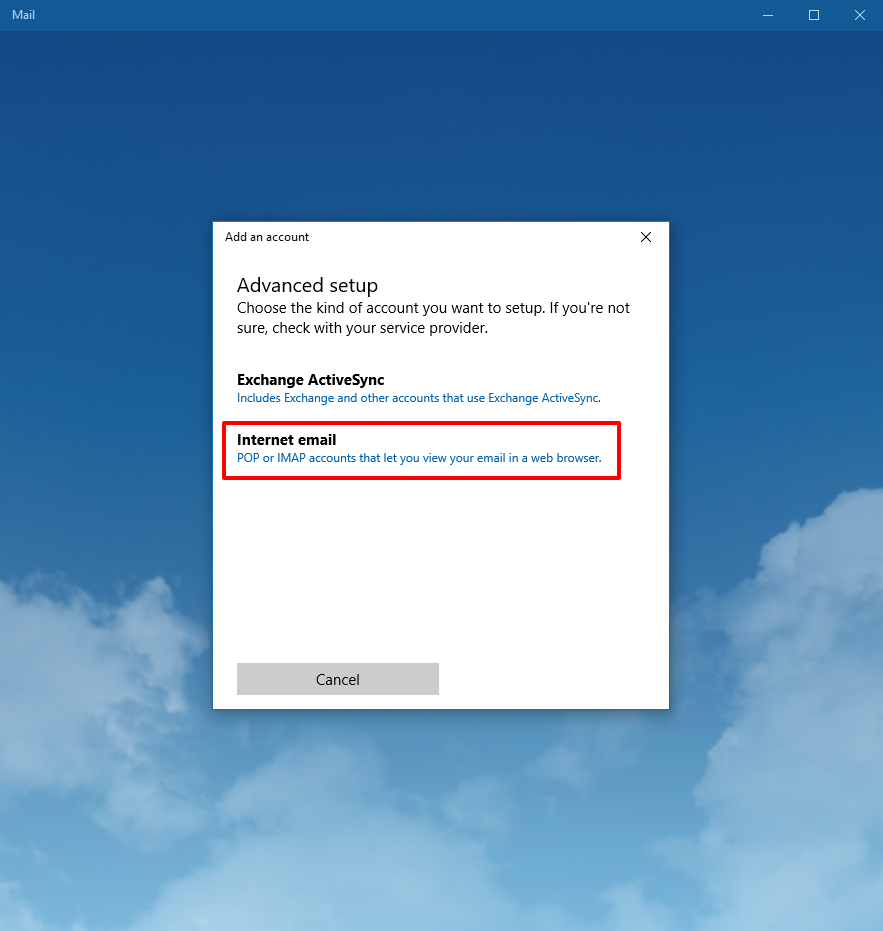
On the next page, click Internet email.
The next screen will include multiple text entry boxes.
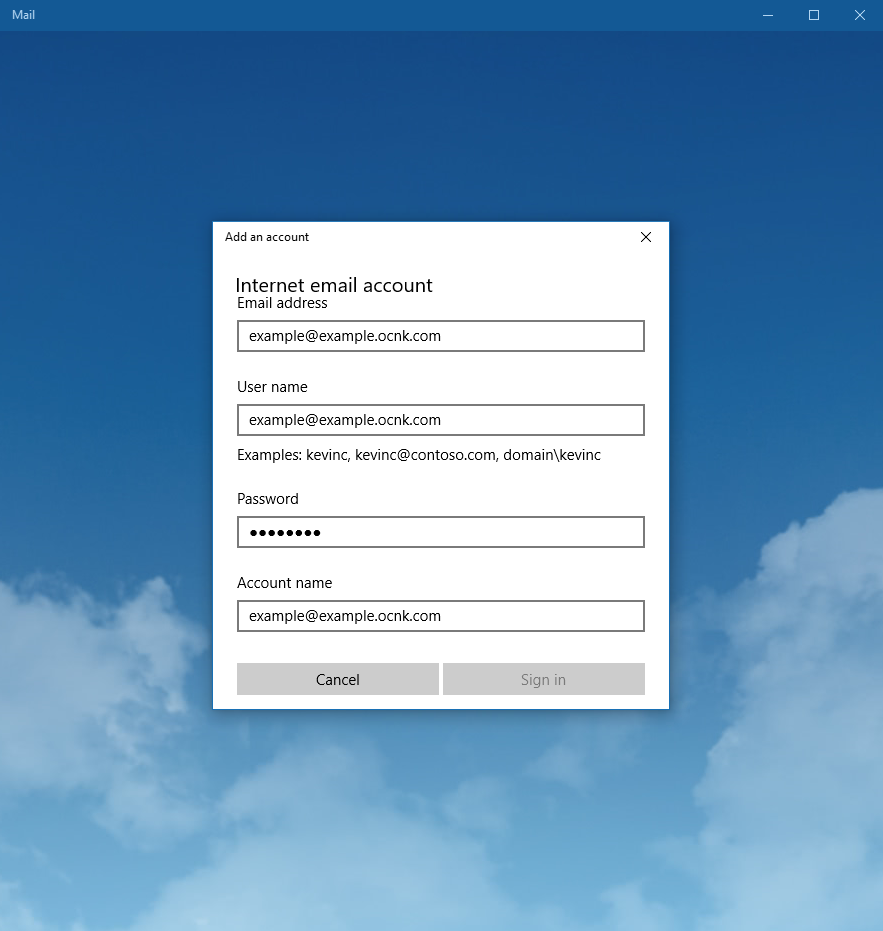
Enter as follows:
| Field | Information |
|---|---|
| Email address: | Enter the full email address you created, including the @ symbol and the domain. |
| User name: | Enter the full email address you created, including the @ symbol and the domain. |
| Password: | Enter the password you used when creating the email account. |
| Account name: | Enter the full email address you created, including the @ symbol and the domain. |
| Send your messages using this name: | Enter the name you wish to be displayed to people who receive emails from you. |
| Incoming email server | Enter the URL from the Incoming mail server field of Step 3 on the Basic Settings → Manage email accounts page in your Shop Manager. |
| Account type: | POP3 |
| Outgoing (SMTP) email server: | Enter the URL from the Outgoing mail server field of Step 3 on the Basic Settings → Manage email accounts page in your Shop Manager. |
There will also be four checkbox options below the text entry boxes. These are:
Outgoing server requires authentication
Use the same user name and password for sending email
Require SSL for incoming email
Require SSL for outgoing email
Please ensure all boxes are checked (they are checked by default).
- After entering all of the above, click Sign In. If this is successful, you a confirmation screen will come up. Click Done, and setup is complete.